

Advancing Paraglider Pilot Skills
Leading tours to Central America and Brazil the past few years has shown me that many pilots need work on honing their skills to be able to fly sites with challenging launches, small LZs or less than optimal conditions. Here a few suggestions to maximize safety and get the most out of all your paragliding adventures.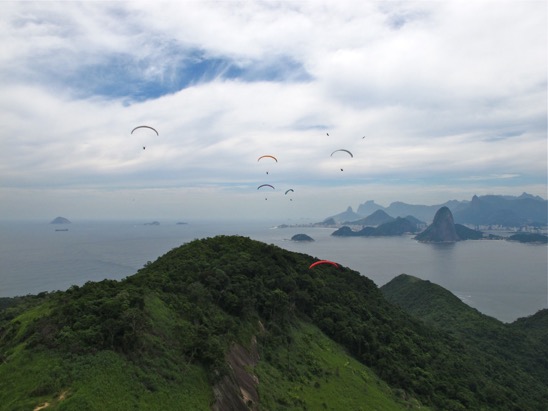
FLY NEW SITES
Try to fly other sites besides the old standbys. Pilots can get lazy when they develop a particular style at a particular site. Maybe your site has a large launch, clear of potential obstacles on the sides, with a great exposure to a consistent wind, with good wind indicators. Some pilots fly steep, grassy sites with light winds, others fly coastal sites with consistent 8-12 mph breezes. The first may have a great no wind forward, the second a good reverse, and the ability to bring the wing up every time and kite it before stepping off. Usually pilots are most comfortable when the conditions and a site most resemble their home site. But foreign countries may have sites that are a bit more challenging. I call it cowboy paragliding, wilder terrain where the launches and LZ’s are not paragliding specific. Many sites are building lots with a scenic view . Some are the edge of a farmers pasture. Many LZ’s are soccer fields, and often NOT regulation sized, or small pastures.
PAY YOUR DUES!
Not just to your national or local paragliding club or organization, that too, but GET OUT and GROUND HANDLE! There is no shortcut, and no substitute, you need to handle your wing, and handle it in all conditions. Anyone can look like a rockstar in steady winds of 3-8 mph. It's the light wind and stronger wind conditions that become challenging. Some people say, “I went to the training hill but the wind was too light so I didn’t kite.” These are the ones who will have a weak forward launch. OR “The wind was a little too strong.” They will be intimidated when the wind gets stronger. In stronger conditions find a safe spot, where there is no chance of getting launched, and the consequences of getting dragged are minimal. Then give it a try. Practice the skills described below under launching techniques.
AT LAUNCH
DO YOUR SAFETY CHECK! When you travel it is even more important to do a thorough safety check. Again, newer pilots often have it down, more experienced ones sometimes drop it or forget.
A safety check is a physical check of your equipment, not a mental review. Do it after setting up your wing, clearing the lines, buckling in, and if there is a breeze holding the D’s as an emergency brake in one hand. Use the other hand to PHYSICALLY CHECK each item.
One example is R,1,2,3,4, STAR,
R = RESERVE (check the pin before clipping in, then touch reserve handle at check in)
1 = HELMET BUCKLE feel the chin strap to be sure the buckle is closed
2 = CARABINERS feel them to be sure they are closed and through the riser loop
3 = HARNESS BUCKLES feel them to be sure they are closed
4 = 4 LINES Recheck of both sets of A’s and both sets of brake lines to be sure they are clear, i.e. check both leading edges and both trailing edges
S = SPEEDBAR, and stirrup if you use
T = TURN i.e. the risers are crossed properly for the turn when doing a reverse launch
A = ACCESSORIES i.e. vario, GPS, Go Pro (cause you know all your real friends want to watch each and every second of all your flights!)
R = RADIO CHECK this lets everyone know you have done your full safety check and are ready to fly
Then grab the brakes by following each carabiner down to the brake handle, being sure each brake line is clear to the pulley. Make an X with the risers if doing a reverse, and grab the appropriate riser in each hand.
Ideally you have been observing conditions at launch since you arrived, so you know the general frequency and strength of the cycles.
Relax, wait for a cycle. Be committed to an inflation, but prepared to stop if it’s not perfect. Don’t end up in a tree with a wimpy “maybe this will work” launch attempt. Pilots who have close calls are rolling the dice. Make each launch clean. Don't try to make ice-cream out of horse sh!t!
LAUNCHING TECHNIQUES
The key to launching is keeping your wing loaded. Three things keep your wing loaded once you have it inflated. Whether you are doing a forward, or have turned after a reverse launch 1. Match your foot speed to the speed of the wing, i.e., RUN, RUN, RUN! 2. Lean forward in a "torpedo" position to weight the glider with your harness to the carabiners to the risers, lines and wing. 3. "Feel" your glider, through the risers and through the brakes to prevent the wing from overflying you.
Some launches in the mountains are flat, with a steep edge. The key on a flat launch is to have a clean, fairly aggressive inflation to bring the wing up into the airflow. Some techniques work particularly well for a light wind or no wind launch. First of all be even more careful about laying out your wing. A well laid out wing will inflate better initially. For a reverse try using 2 hands on the A’s rather than the A’s and D’s method (both A’s in one hand, both D’s in the other), or A’s and brakes method. In a light wind you want to adjust the inflation with your body and upward pressure on the A’s, and not retard the inflation with brakes or D’s. For either a reverse or a forward take a step towards the wing, starting with NO pressure initially on the A’s, give a quick fairly aggressive step using your body and the harness to initiate the inflation, then guide up with the A’s.
Don’t hesitate to do a “test” inflation. Bring the wing up a time or two to test the air flow, but not with the intension to launch. Some pilots will wait, watching a wind indicator when conditions are really not varying. They get more and more nervous and then often blow the launch. Doing a test launch can give you valuable information about just how much energy you need for a good inflation, how much rotor is present, etc.
In a stronger wind or gusty wind situation there are several techniques that can help. Remember all inflations should be smooth, especially in strong conditions. You won't need a strong input, a gentle relaxed input will serve you better. Some pilots prefer both A's in one hand and both D's in the other, or A's and C's to moderate the speed of the inflation, but if your timing is good just A's works fine too. Step up under the wing as it comes up to decrease the wing speed, give it just enough brake to check overflying. Make a quick turn, lean forward and don't over brake!
PARAGLIDING TIPS
The most common cause of accidents and incidents I've seen while traveling would be scratching. Don't scratch! Almost all of the sites in Costa Rica have some glide to get to the LZ, and I always emphasize DON'T SCRATCH to my clients. Yet pilots get carried away with extending their flight, or lose track of their altitude relative to the glide needed to the LZ, and they get caught. I had 2 pilots injured last year after scratching too low. When it was too late to make it to the normal LZ they had to settle for poor landing zone options that they did not have the skills to land in safely. They both had hard landings and were injured. Unless you have very good small LZ skills, DON'T SCRATCH!
LANDINGS
Many paragliding specific landing zones are large, clear of obstacles and bordered with wind socks visible from 2000 feet over. These are great for learning and safety, but can make pilots lazy.
Small LZ’s demand more skill and constant attention to changes in altitude and winds.
If your LZ is large, make it artificially smaller by imagining it was the size of a soccer field or smaller. Imagine how you would approach a smaller field.
A common mistake is to commit to the field too soon, flying out over the LZ before burning off sufficient altitude. Once you are over the LZ, especially a small one, your options are diminished. By definition, a small LZ has no room for more than maybe a 90 degree turn or a few S turns, so you need to lose the last bit of altitude before your final approach either in front, behind or at the side of the LZ, not over it or you will over shoot! Pick a corner and decide that’s where you will be entering the LZ on final. It should be the corner most free of obstacles for the final approach and giving the cleanest access to the LZ. Do your spirals, or lazy circles, or figure 8’s keeping an eye on the LZ for reference, then approach over your chosen corner to do the turn to final approach. Get out of your harness early! Don't slow the wing down prematurely leaving nothing for your flair. Let the wing fly on final, save energy for an aggressive flair.
Flapping? Can be dangerous as the chance of stall is increased, and if you need to flap it usually means your approach was poor. Don’t try it without practice at a training hill with a safe (soft) landing like sand. Big ears into an LZ? Some people love it, but again don’t try it without lots of practice.
Out of yes harness early? Yes, good form, better position for a PLF (parachute landing fall) if it’s needed.